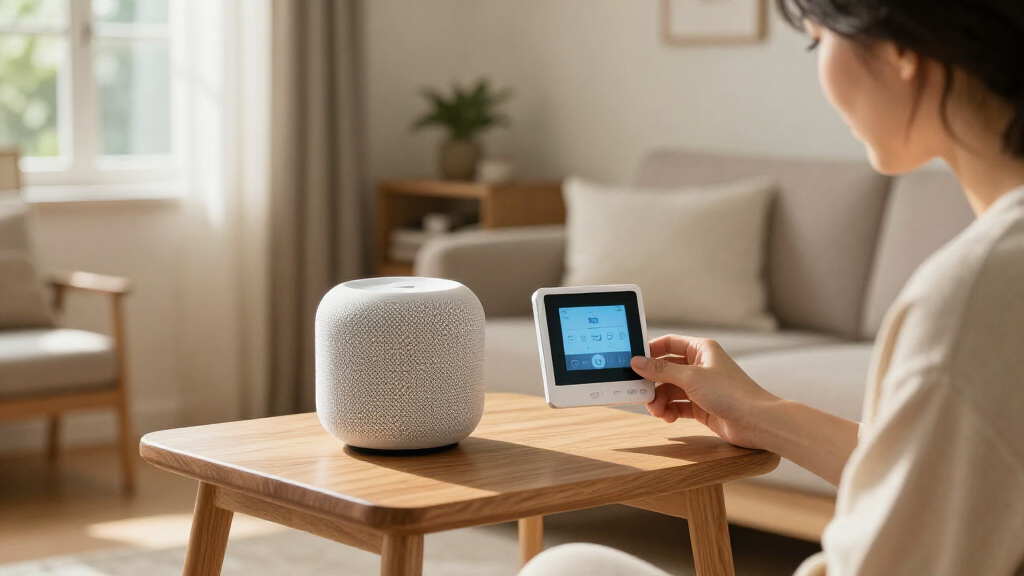

Set up a smart home device by connecting it to power, pairing it with its app or hub, and checking that you can control it reliably. This guide is for beginners setting up a compatible smart bulb, plug, sensor, speaker, or similar device. Allow 30-60 minutes for a first setup; additional devices often take less time once your network and app are ready.

Get everyday essentials delivered free with Prime
- Fast, free delivery on millions of items
- Prime Video, Amazon Music and more included
- Member-only deals all year
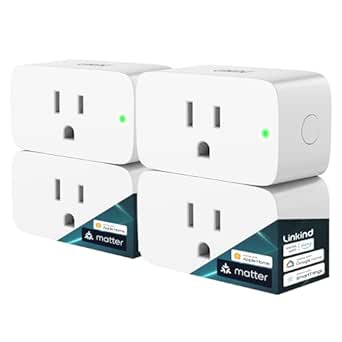
Linkind Matter Smart Plug
- ✔ Connectivity: Matter and 2.4 GHz Wi-Fi
- ✔ Platform support: Apple Home, Alexa, Google Home, and other compatible platforms
- ✔ Power capacity: 1800 W

Echo Show 5 (Charcoal)
- ✔ Display: 5.5-inch touchscreen
- ✔ Dimensions: 5.8 × 3.6 × 3.2 inches
- ✔ Weight: 16.1 oz (456 g)

Kasa Smart Plug HS103P4 (4-Pack)
- ✔ Pack size: 4 plugs
- ✔ Connectivity: 2.4 GHz Wi-Fi
- ✔ Hub: Not required
Difficulty: Beginner | Time: 30-60 minutes for the first device
What You’ll Need
Tools & Materials:
- Smart home device and any included power adapter or batteries
- Phone or tablet with internet access
- Manufacturer’s app, downloaded from the official app store
- Home Wi-Fi name and password, if the device uses Wi-Fi
Knowledge:
- Basic ability to install an app and follow its setup prompts
- Access to the home Wi-Fi network and its password
Check the device box or manufacturer’s product page for its Wi-Fi band, hub, and phone requirements. Some devices use a separate hub, Bluetooth, or a particular wireless band. Keep the device near the router during pairing, and use a strong, unique password for your account.
Linkind Matter Smart Plug
The Linkind Matter Smart Plug is the most adaptable outlet in this group for households that may use more than one smart home platform. Matter support lets it work with Apple Home, Alexa, Google Home, and other compatible systems, so we can choose an ecosystem without being locked to the Kasa plug’s Alexa and Google focus. Its offline LAN control is another practical distinction: when internet access drops, supported local control can keep connected devices responsive on the home network.That flexibility comes with a setup condition. Apple Home, Alexa, and Google Home integration requires a Matter-certified hub or controller, so this is not the simplest pick for someone starting from scratch. Like the Kasa, it is rated for 15 A and 1800 W and relies on 2.4 GHz Wi-Fi; unlike Kasa, it is sold as a single plug here and is limited to Type A U.S. outlets. Its fire-resistant design and FCC/ETL certification support confidence in its intended use, but do not erase the need to check appliance load and outlet compatibility.We rank Linkind first because platform breadth and local operation give it a stronger role in a mixed-device smart home than a basic Wi-Fi plug. Choose it when you value flexibility and already have the necessary controller. If you want multiple plugs with no hub, Kasa is the more direct alternative; if you want a screen and voice assistant in one device, the Echo Show 5 fills a different need.
Pros:
- Matter compatibility supports several major smart home platforms.
- Offline LAN control can keep supported local controls available without internet access.
- Supports voice commands, schedules, and a 15 A / 1800 W load rating.
- Fire-resistant construction with FCC/ETL certification.
Cons:
- Requires a Matter-certified hub or controller for integration with the major platforms.
- Works only with 2.4 GHz Wi-Fi and Type A U.S. outlets.
Best for: Households with a Matter-compatible controller that want a smart plug to fit Apple Home, Alexa, Google Home, or other compatible platforms.
Not ideal for: Buyers without a Matter hub, those using non-Type A outlets, or anyone who wants a simple multi-plug setup without controller requirements.
Bottom line: For a connected home that already has a Matter controller, Linkind is the strongest all-around plug here because it combines broad platform support with local control.
“For a connected home that already has a Matter controller, Linkind is the strongest all-around plug here because it combines broad platform support with local control.”
Echo Show 5 (Charcoal)
The Echo Show 5 brings smart home control to a small touchscreen rather than adding another automated outlet. Its 5.5-inch display can show news, weather, photos, and compatible device controls, while Alexa voice commands make it useful when hands-free interaction is more convenient. Compared with either plug, it can serve as a visible control point in a kitchen or bedroom; compared with a larger display, its compact footprint is easier to fit on a bedside table or crowded counter.The built-in 2 MP camera supports video calls, and its physical privacy shutter gives us a direct way to cover the lens. A separate mic and camera off button adds another layer of control. The full-range speaker is designed for deeper bass and clearer vocals, making the device more than a screen for smart home commands. Recycled polyester yarn and recycled aluminum are also part of its construction.Its main limitation is ecosystem scope: it is an Alexa-centered display, not a universal Matter plug or a standalone way to automate several outlets. The 2 MP camera may not suit buyers who prioritize detailed video, and Bluetooth pairing can be restricted with speakers that require PIN codes. Choose the Echo Show 5 for an accessible visual Alexa hub; if outlet control across platforms is the priority, Linkind is a better match, while Kasa covers several outlets without adding a display.
Pros:
- 5.5-inch touchscreen adds visual controls and at-a-glance information.
- Alexa voice access and video calling in a compact device.
- Camera shutter and mic/camera off button provide physical privacy controls.
- Uses recycled polyester yarn fabric and recycled aluminum.
Cons:
- The 2 MP camera may not satisfy buyers who need detailed video.
- Bluetooth support may not pair with speakers that require PIN codes.
- Alexa-focused functionality is less platform-flexible than the Linkind Matter plug.
Best for: Alexa households that want a compact screen for smart home controls, daily information, photos, and video calls.
Not ideal for: Buyers seeking broad smart home platform flexibility, a high-detail video camera, or several automated outlets in one purchase.
Bottom line: The Echo Show 5 is the right pick when a compact Alexa screen is more useful to your home than adding another smart outlet.
“The Echo Show 5 is the right pick when a compact Alexa screen is more useful to your home than adding another smart outlet.”
Kasa Smart Plug HS103P4 (4-Pack)
When the goal is to automate several lamps, fans, or humidifiers, the Kasa HS103P4 stands apart by packaging four Wi-Fi plugs together. Each connects directly to a 2.4 GHz network through the Kasa app, so there is no separate hub to add before using schedules, timers, countdowns, or remote control. Alexa and Google Assistant voice support cover the two major platforms named for this model.Compared with Linkind, Kasa gives up Matter and the stated offline LAN capability in exchange for more straightforward direct Wi-Fi setup and multiple outlets in one set. Compared with the Echo Show 5, it automates appliances instead of providing a screen, camera, and speaker. Each plug has a push-button actuator for local operation, and the 15 A, 1800 W rating matches Linkind’s stated capacity. UL certification is a useful safety credential, while the compact plug dimensions can help when outlet space is limited.The tradeoff is narrower connectivity: Kasa is specified for Alexa and Google Home, not Apple Home or Matter, and it shares the 2.4 GHz-only limitation of Linkind. If your household already uses Alexa or Google and wants several basic appliances on schedules, this is the most practical multi-outlet choice. If you expect to mix ecosystems or want local control through a Matter setup, Linkind is the stronger individual plug.
Pros:
- Four plugs provide outlet automation across several rooms or devices.
- Connects directly to 2.4 GHz Wi-Fi without a hub.
- Kasa app supports remote control, schedules, timers, and countdowns.
- Alexa and Google Assistant voice control, with UL certification.
Cons:
- Limited to 2.4 GHz Wi-Fi.
- Does not list Matter or Apple Home compatibility.
- Offers less platform flexibility and local-control emphasis than Linkind.
Best for: Alexa or Google Home users who want to automate several lamps or small appliances through direct Wi-Fi without adding a hub.
Not ideal for: Apple Home households, buyers looking for Matter support or stated offline LAN control, and homes without a 2.4 GHz Wi-Fi network.
Bottom line: For Alexa or Google households automating multiple everyday appliances, Kasa is the straightforward multi-room pick, provided 2.4 GHz Wi-Fi is available.
“For Alexa or Google households automating multiple everyday appliances, Kasa is the straightforward multi-room pick, provided 2.4 GHz Wi-Fi is available.”
As an Amazon Associate we earn from qualifying purchases.
Before You Start
Check compatibility before opening the setup flow. Confirm that the device works with your phone, network, and preferred smart home platform. A device that requires a hub will not pair directly with Wi-Fi unless its instructions say it can. If you rent or share the home, get permission before installing devices that change wiring, locks, cameras, or shared settings.
For a wired device such as a light switch, turn off power at the circuit breaker and follow the manufacturer’s directions. If you are unsure about wiring, use a qualified electrician. Never open electrical equipment or handle exposed wires while power is on.
Step-by-Step Instructions
Step 1: Prepare the network and account
Connect your phone to the home Wi-Fi network that the device will use. Check the device instructions for supported bands; many devices require 2.4 GHz Wi-Fi, while some newer devices support other options. Install the manufacturer’s official app and sign in or create an account. Turn on Bluetooth and location access if the setup instructions request them, since the app may use these permissions to discover nearby devices.
If you do not know the Wi-Fi password, retrieve it from your router, internet provider’s app, or the person who manages the network before you begin.
Tip: Avoid changing router security or disabling a network password to force pairing. Use the device’s stated network requirements instead.
Check: Your phone is online on the intended home network, and the official app opens with your account signed in.
Step 2: Power on the device
Place the device within reach of the router, then connect its supplied adapter or install the specified batteries. For a bulb or plug, follow the printed instructions and switch it on. Wait for the status light or sound that signals startup. If the device is already configured or the app cannot find it, use the manufacturer’s reset procedure before trying to pair it.
Tip: Do not guess at a reset sequence. Button holds differ by model and can erase an existing setup.
Check: The device powers on and shows the pairing indicator described in its instructions.
Step 3: Add the device in its app
Open the app and choose its add-device, set-up, or equivalent option. Select the correct device type and model when prompted. Follow the on-screen steps to discover the device, scan a code, or connect to its temporary setup network. Keep the phone near the device and do not close the app while pairing is in progress.
If the device requires a hub, set up and power on the hub first, then add the device through the app’s hub flow.
Tip: Use the setup method named in the manufacturer’s instructions; different models from the same brand may pair differently.
Check: The app identifies the device and advances to a network or account-linking step.
Step 4: Connect it to Wi-Fi or its hub
Choose the correct home network in the app and enter its password carefully. If the device connects through a hub, select the hub that is already paired to your account and follow the prompts to join the device to it. Wait for the app to finish connecting before moving the device or switching networks. The setup can take a few minutes.
Tip: If the network name appears more than once, check which one matches the required band. Do not share your Wi-Fi password in a public or shared device name.
Check: The app reports that setup is complete or shows the device as online.
Step 5: Name the device and assign its room
Give the device a short, recognizable name, such as “Desk lamp” or “Hallway sensor,” then assign it to the room where it is installed. Use names that distinguish similar devices and are easy to say if you plan to use voice commands. If the app offers platform linking, link only the services you use and review the permissions it requests.
Tip: Room names and device names help prevent confusion when you add more equipment. Avoid names that include passwords, access codes, or personal details.
Check: The device appears in the correct room with a name you can identify quickly.
Step 6: Test the main control
Use the app to perform the device’s basic action: switch a light or plug off and on, request a speaker response, or check a sensor reading. If you connected it to a voice assistant, test one simple command after app control works. For a sensor, trigger the condition safely according to its instructions and check that the app records the change.
Tip: Test from the room where the device will normally be used. A successful test beside the router may not show whether the signal reaches its final location.
Check: The device responds to the app command or reports the expected sensor state without an error.
Step 7: Move it to its final location and retest
Install or place the device in its intended location according to the manufacturer’s instructions. Keep it within the recommended range of the router or hub, and avoid locations blocked by thick walls, metal cabinets, or large appliances when possible. Test the main control again from your phone.
Tip: For plugs, bulbs, and appliances, check the device’s rated load and intended use before connecting equipment. Do not use a smart plug with a high-load appliance unless its rating explicitly permits it.
Check: The device stays online and responds from its intended location.
Common Mistakes to Avoid
- Trying to pair the device on a network band it does not support. — Check the model’s network requirements first and select a compatible network during setup.
- Starting setup too far from the router or hub. — Pair nearby, then move the device and test its connection in the final location.
- Using an unofficial app or selecting a similar but incorrect model. — Get the app from the official app store and match the model number on the device or packaging.
- Resetting the device repeatedly without following its model-specific instructions. — Read the reset directions and use a reset only when the device is in the wrong setup state or the app cannot discover it.
Troubleshooting
Problem: The app cannot find the device.
Solution: Confirm that it is powered on and showing its pairing indicator. Move the phone and device closer, enable any requested Bluetooth or location permission, and retry discovery. If it was previously paired, follow the manufacturer’s reset procedure once and try again.
Problem: The Wi-Fi password is rejected or setup stops during connection.
Solution: Re-enter the password, check the network name, and confirm that the device supports the selected Wi-Fi band and security settings. If the router combines bands under one name, consult its instructions for connecting a 2.4 GHz-only device. Do not remove network security to complete setup.
Problem: The device shows as offline after setup.
Solution: Check that the router or required hub is powered and online. Move the device closer, then restart it using the manufacturer’s instructions. If it reconnects nearby, the final location may have a weak signal.
Problem: The device appears in the app but does not perform its action.
Solution: Check its power, physical switch, batteries, and operating mode. Confirm that the app is controlling the correct device and that it has permission to perform the requested action. For a plug or switch, verify the connected equipment is compatible and within the device’s rated limits.
What Success Looks Like
The device is listed in the correct room in its official app, shows as online, and performs its main action when controlled from the intended location. Any linked voice control or sensor reporting also works in a simple test. The device remains connected after you close and reopen the app.
Next Steps
Read the privacy and account-sharing settings before connecting cameras, microphones, locks, or other devices that handle sensitive information. Give household members only the access they need, install firmware updates through the official app, and review account security settings. Add further devices one at a time, naming each by room and purpose. If a device repeatedly drops offline, check router coverage and the manufacturer’s support guidance before buying extra equipment.
Frequently Asked Questions
Do all smart home devices need Wi-Fi?
No. Some connect directly to Wi-Fi, while others use Bluetooth, a hub, or another supported wireless protocol. Check the model requirements and set up any required hub before pairing the device.
Can I set up a smart device without the manufacturer’s app?
Some devices can be added through a compatible smart home platform, but many require the manufacturer’s app for initial setup, firmware updates, or account linking. Follow the instructions for your model and install apps only from official sources.
Why does a device work near the router but fail in its room?
The signal may weaken through walls, floors, metal, or large appliances. Move the router, hub, or device to improve the path, then test again. Check the device’s range guidance before adding a repeater or mesh node.
Should I use the same account for every smart home device?
Follow the platform’s account-sharing guidance and use an account you can secure with a unique password and multifactor authentication when available. Avoid sharing a personal login broadly; use household or guest access features where supported.